I’ve managed to install four versions of AppleWorks on my OmniDisk in Virtual II Emulator. I’ve also been testing various TimeOut Applications. AppleWorks 5.1 and 4.3 come with many of the TimeOut functions built in. So I’ve been trying lots of the other add-ons published separately to see what is out there. Here’s a link to startup video:
https://www.dropbox.com/s/0pagxsmp82toatf/aw5%20ipod.m4v?dl=0
Here is a link to lots of the stuff: Link updated 1/27/2020.
https://mirrors.apple2.org.za/ftp.apple.asimov.net/images/productivity/integrated/appleworks/timeout/
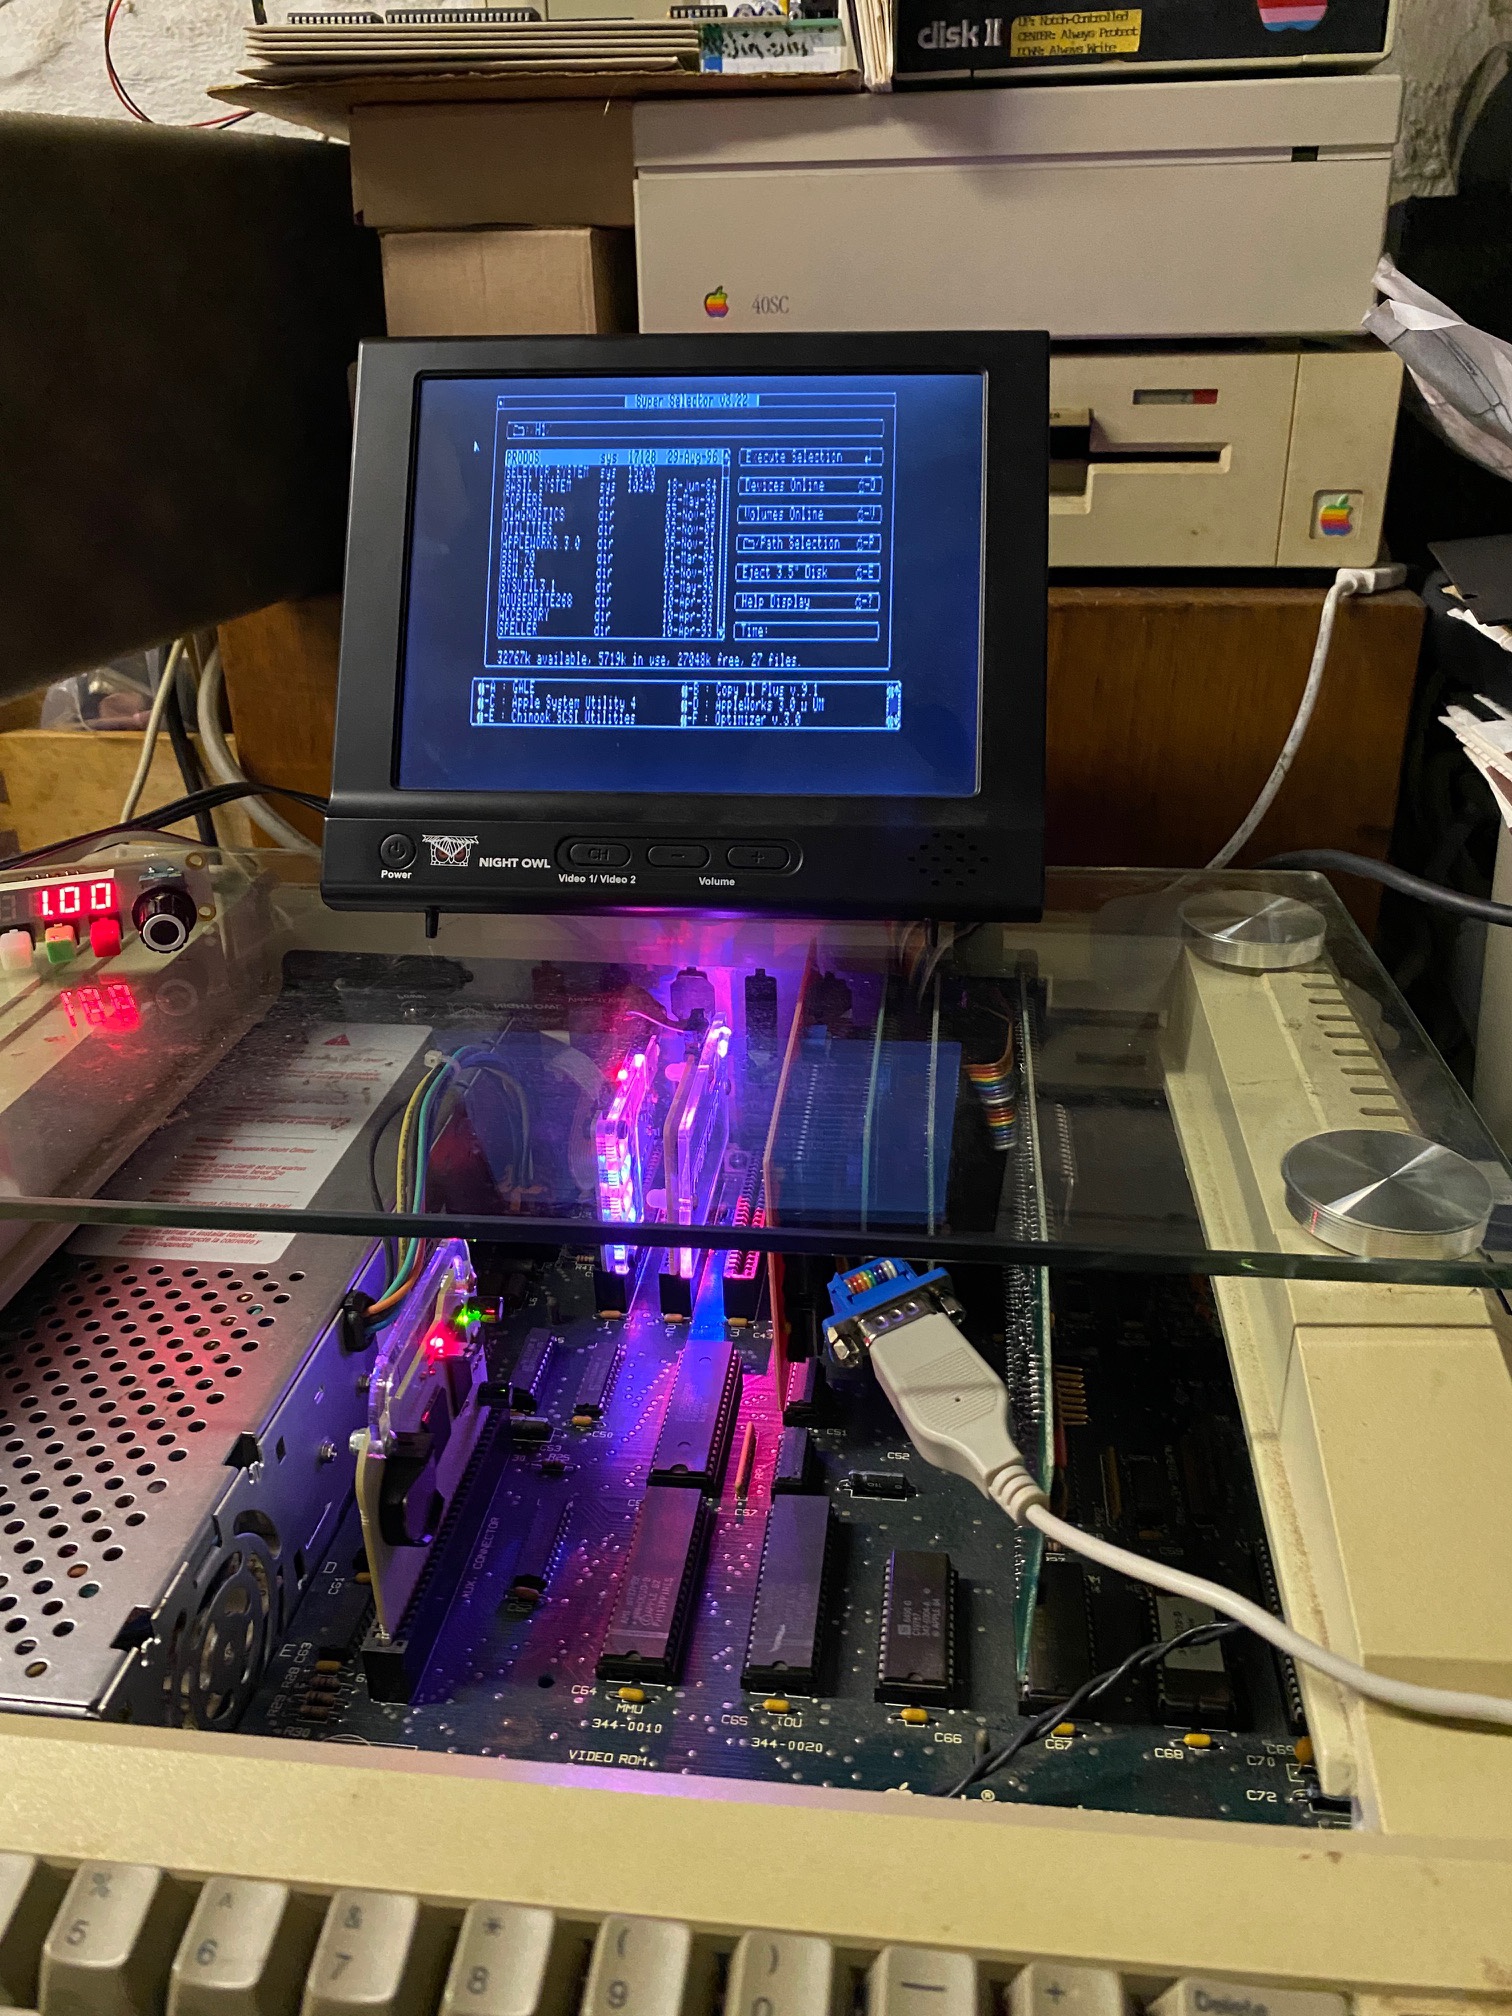
 Here is my OmniDisk 32 MB HardDrive in Virtual II. This Super Selector is a pretty nice text based Launcher. It has Quick-Keys you can set up. You can see Closed-Apple-F is for AppleWorks 5.1. There’s an extra step to setting up the Quick-Keys which isn’t noted in the process. Easy, once you know. I’ll post the Steps at the End.
https://www.dropbox.com/s/ganv43vy8dyggvu/SUPSELECT322.dsk?dl=0

In Virtual II Emulator I always had the No-Slot Clock selected but I wasn’t seeing the time-stamps showing up on files. Then a light bulb finally went on. I had to Install it on the Boot Disk and run the Setup. So I downloaded the ProDOS version:
https://ultimateapple2.com/forums/forum/main-forum/no-slot-clock-goes-under-the-ram-chip/250-no-slot-clock-software
Click to access No-Slot%20Clock%20-%20User%27s%20Manual.pdf


Time stamps finally showing up.

Also, I grabbed the TimeOut TO.ABOUT.TIME application (from link at top) because it has yearly calendars for every year. It turns out there are 14 types of years. The Calendar.A turns out to be 2017.

 I’ve been working with the Super Selector v3.2.2 on the Hard Drive (Virtual and Real) on the Apple IIe. I wanted to change some of the “Quick-Keys” which startup programs you assign to them. It turns out the entry of the information is easy. However, the saving your entry process is has an extra step not noted in the screens process. Quick-Key Setup.
1) You use the Open-Apple-Q to bring up the Menu of Quick-Keys.
2) From there you select the Quick-Key you’d like to change by scrolling to it
and hitting the Return Key. This brings up the edit menu for that item.
3) You change the Title of the Quick-Key on the top line and the path on the
second line.
4) Then you select Open-Apple-A to Accept.
[ the Accept box disappears ]
5) Lastly, you a) hit esc to go back to the Main Menu b) Then type Open-
Apple-O to go to the Options Screen and then c) you save permanently with Open-Apple-S. You’ll see the box blink a little.
On the Save screen there are other configuration options. See below:
 [ Super Selector 3.2.2 ].
Not only are you saving the Quick-Key you just Setup, but also the location. In my case I run from a Hard Drive (OmniDisk in the Emulator as well as SCSI Drive in real lle) so Slot 7 Drive 1 is the selection. When you use Open-Apple-S to Save the Config you’ll see the Box with “Save Copy” change to semi-solid background until save is completed.


 Posted by vintagegeek


You must be logged in to post a comment.